
I recently came across a measurement problem that required significantly more bandwidth than the typical load cell amplifiers you find in Arduino projects could handle. After some research, and a lot of *very* eye-opening revelations about the state of hobby electronics and the ability to read datasheets, I settled on the Burr-Brown INA125 Instrumentation Amplifier. It is a bridge amplifier with precision voltage reference and gain set by a single resistance, ideal for use with load cells.
http://www.ti.com/product/INA125
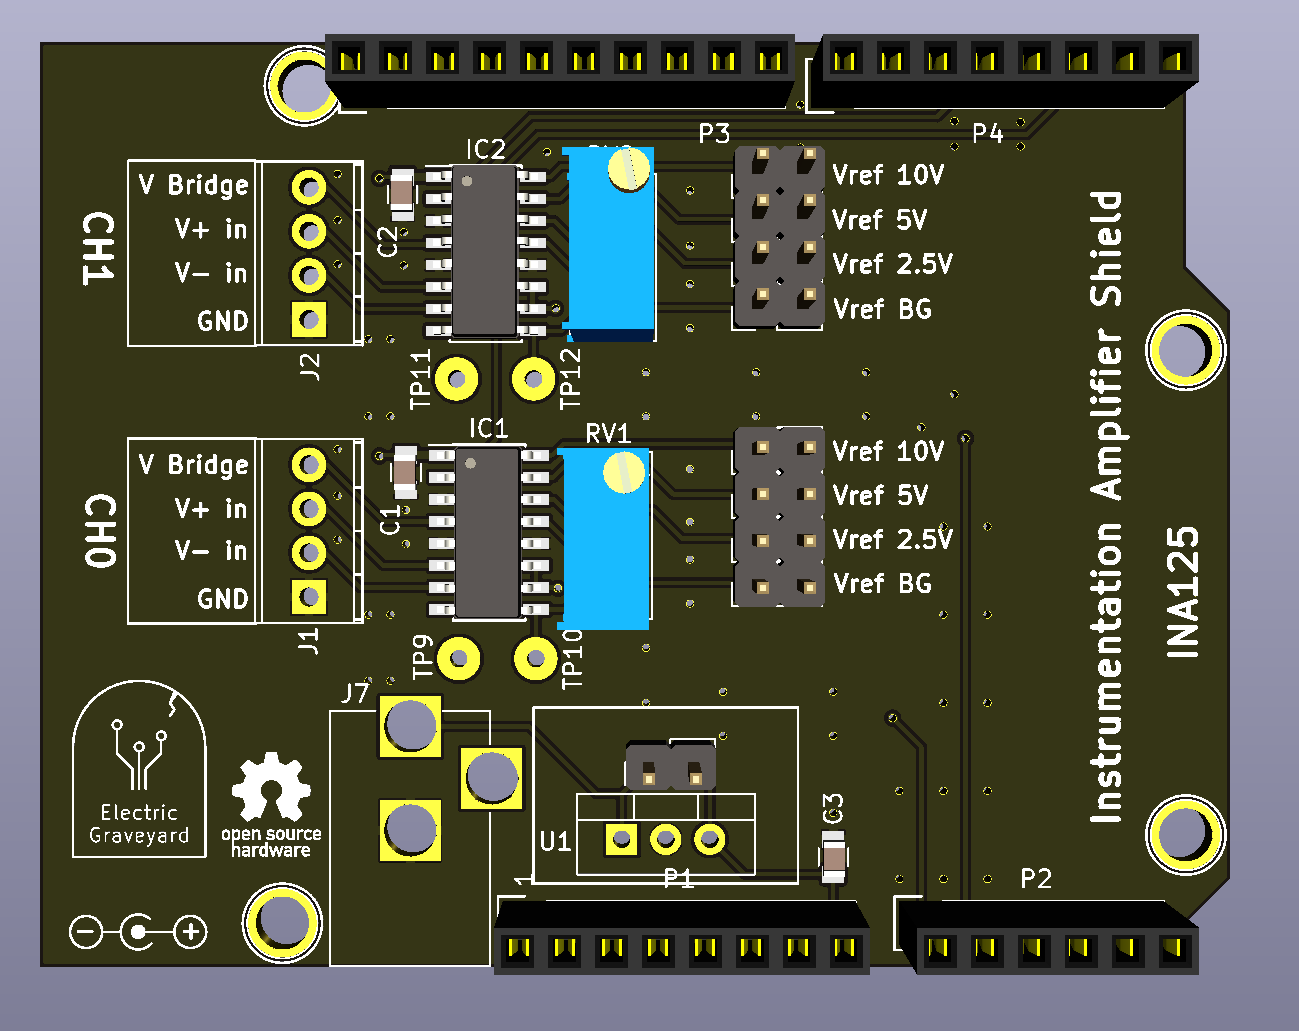
My solution had to be a living proto-board of sorts, so I broke out anything configurable. It is of course open source, find it here:
https://github.com/Tonymac32/LoadCellShield
This IC has some bad press, as I found looking around. Of course, many of the examples had it improperly wired, improperly powered, improperly configured, etc etc etc.
As the Github explains, some basic rules apply:
- Set your gain based on the maximum input signal, and the maximum value your Arduino or compatible can handle.
- Choose a voltage regulator or supply capable of safely powering your amplifier and Arduino compatible.
- Do not select a VRef above your input voltage. The chip does not magically create voltage from the good intentions of its user, your results will not be what you expect or want.
- Do not forget to drive the digital pins (2 and 4) high to wake the amplifiers.
- The regulator position on the shield can be left unoccupied, a small DC-DC converter can be used, a linear regulator, a jumper. This is the primary mechanism of supporting multiple boards: The Sparkfun ATSAMD21 breakout require 5V, Arduino Uno and Adafruit Metro M4 Express can handle 12V. ( Each have been tested)